
When creating learning or training, I often find that learners will benefit from a handout or job aid. This can be a job aid with key points, step-by-step instructions, or a worksheet for taking notes. Yes, many learners want their notes online, but I still find there is value in providing a paper handout for some of our learners.
I find that PowerPoint is one of the easiest tools to create a handout because it allows me to control formatting easily. It allows me to create handouts that need to be simple or fairly complicated. However, I tend to only use PowerPoint for a handout of 1 to 4 pages. If I need to create a manual or longer step-by-step instructions, I prefer to use Microsoft Word.
Using PowerPoint to create handouts
Note that these step-by-step instructions are provided for the desktop version of PowerPoint 2016. Instructions are a little different for other versions of PowerPoint.
Setting the handout size
To set up the size in PowerPoint:

- Open a new blank PowerPoint file.
- On the Design tab, click Slide Size, and then click Custom Slide Size.
- Change Slides sized for: to Letter Paper (8.5×11 in).
- Change Orientation to Portrait (skip this if your handout will have Landscape orientation).
- Click Ok. Since you just started a blank file, it doesn’t matter if you click Maximize or Ensure Fit.
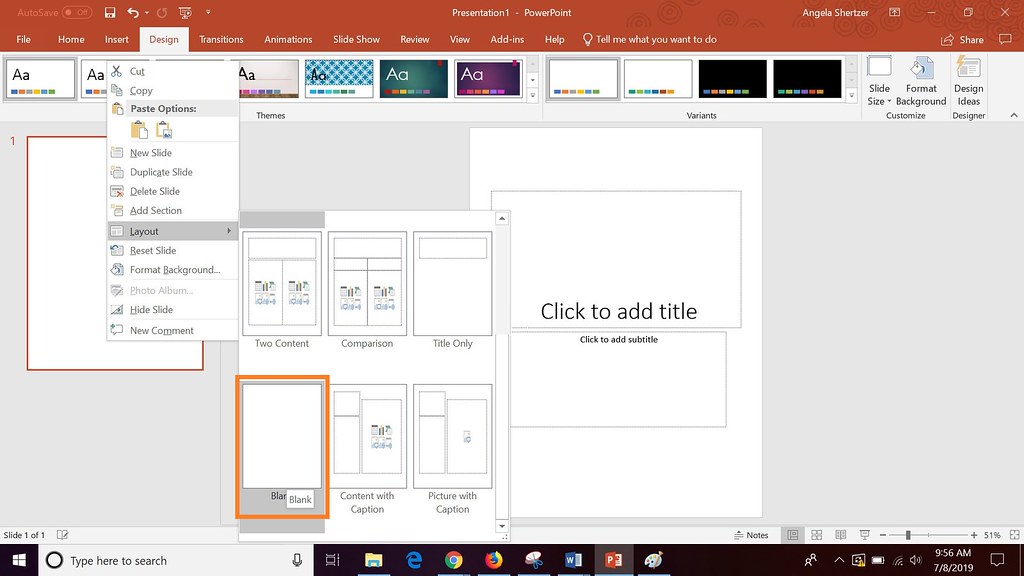
Clearing the layout
Since PowerPoint assumes you are designing a presentation, it starts with a title slide layout. You need to just remove that.
- On the left side of the window, right-click the slide preview, and then click Layout.
- Scroll down, and then click Blank.
Designing the handout
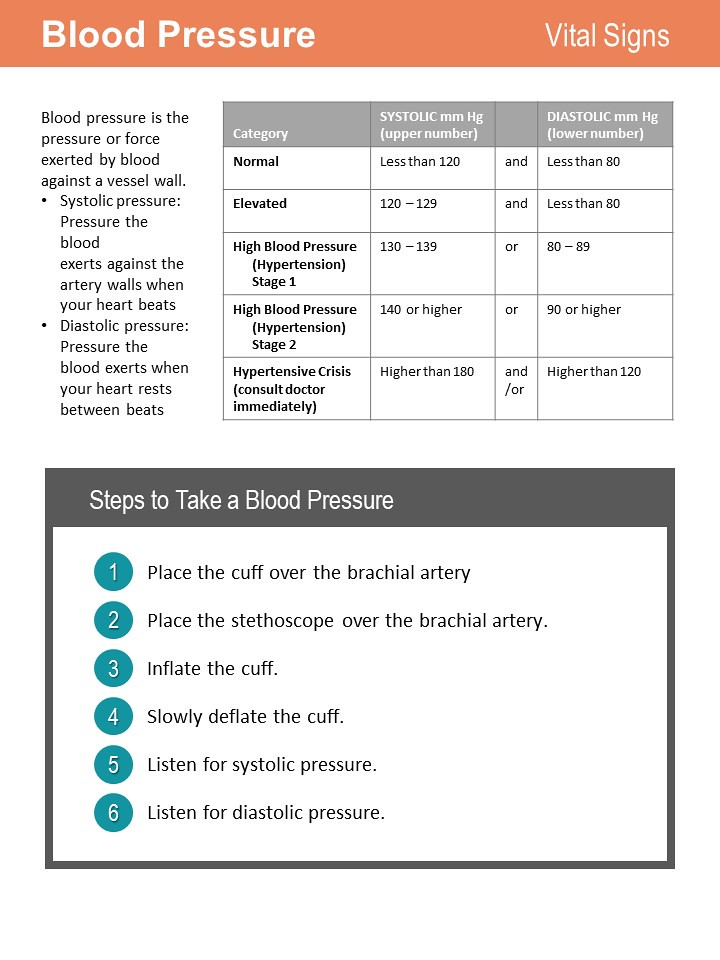
Here’s where you get to be creative. Let’s look at a few examples first.


There are a number of different tools that you can use in PowerPoint to design your handout. If you go to the Insert tab in PowerPoint, you can see a lot of options, but some of my favorites include shapes, tables, and fonts and headings.
Shapes
Looking at my examples, you can see that I use a lot of rectangles when creating handouts. Rectangles allow you to box in the title or headers in a way that draws the eye to them and creates emphasis. They can also be used to separate items, such as step-by-step instructions.
To insert a rectangle or other shape:
- In the Insert tab, click Shapes, and then select the rectangle tool.
- Click and drag your cursor to insert the rectangle or other shape.
If you need more help, see the Shapes lesson from GCF LearnFree.org (GCF LearnFree.org has one of the best tutorials for learning how to use PowerPoint).
Tables
Tables allow you to organize and align text on the handout. Look at my examples and notice how I have used them to create a space where learners can take notes, as well as to segment information.
Fonts and Headings
Be consistent with your use of fonts. Typically you will only want to use 1 or 2 font types per handout, but you can change the size and weight (i.e. make it bold) to help delineate importance of ideas. Keeping fonts simple helps to keep the handout easy to read for the learners. Simple is almost always better! Sometimes you may want to use another font for emphasis, but only do that with caution.
If the handout is part of a larger educational project, such as a course or set of e-learning modules, use consistent fonts and colors as the larger project.
Color
Notice that the designs are fairly consistent with color. I tend to favor navy blue and gray because they print well in color or black and white. I work for a college that uses orange and navy blue as branding colors, so these show up in my handouts too.
Generally you want to be careful with your use of color and save it for accents. Use it! But just keep in mind that too much can be unsettling for some learners. In addition, avoid using color for key concepts due to the percentage of learners who have issues discerning color. Color is best used as an accent.
Printing and reviewing your handout
I find that it’s really helpful to print a copy of your handout and review it on paper. This is generally how your learners are going to use it, right?
When reviewing, I’m thinking about how the whole handout looks. Is it easy to see the big ideas? Are step-by-step instructions formatted clearly? Is there plenty of white space to rest the eye? Are fonts consistent?
I also review for grammar and spelling. Are there any errors that need to be fixed? Fix them.
Sometimes I will also ask a colleague to review the handout or even let it sit on my desk for a few days so that I can give it a fresh review before considering it complete.
Exporting as a PDF
If you are supplying your handout via email or through a web site or LMS, you need to make sure it’s saved as a PDF. Do not supply a PowerPoint copy of the handout to the learner. PDF files are smaller than PowerPoint files. PDF files consistently can be opened regardless of the device the learner will use to open the email, which learners would need to have either PowerPoint installed or a PowerPoint file viewer installed on the device.
- Click the File tab.
- Click Export.
- Click Create PDF.
- Give the handout an easy-to-read name, and then click Publish.
After creating your PDF, you can share it with your learners.
That’s it!
What about you? Do you have any tricks you use for creating handouts?
Photo by Helloquence on Unsplash
Great post! I have never used PowerPoint this way because I didn’t realize that I could. Thanks for outlining how to use this feature. It will be very helpful for me in the future! Thanks again for sharing.
Glad to share!